
Distributor onboarding guide
Set up ShopXpert vending for a customer
Follow these steps to set up a customer's shop on ShopXpert vending. Tick each step when it is done. Your progress is saved in this browser.
Your checkmarks are saved in this browser only. Nothing is sent to ShopXpert.
What to do
- Go to shopxpert.com/register. You create this account on behalf of your customer, the company where you will install ShopXpert.
- Enter the customer’s organization name, then your first and last name.
- Create a password and confirm it.
- Enter your email address. Use the same email as your main distributor account. Then you have one login for every company you set up, and you can switch between them from the dashboard of your main account.
- Tick the agreement box and click Create Account.
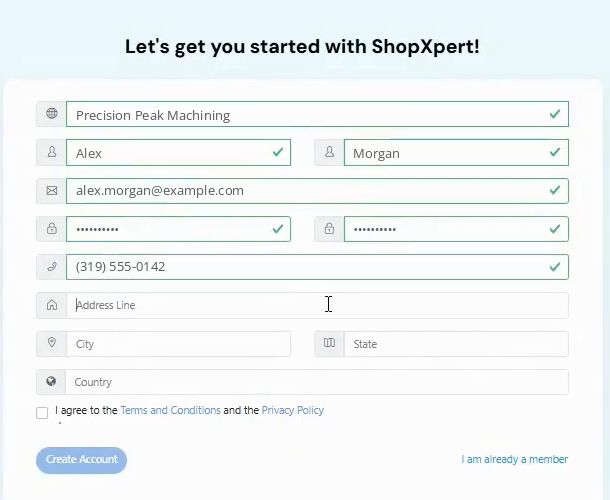
The registration form, filled in for the customer What to do
- Open the confirmation email from ShopXpert and click the verification link. The link works once, for 24 hours.
- Go to the login page and sign in.
- If this is not your first account, log out of the account you are in first, then log back in.
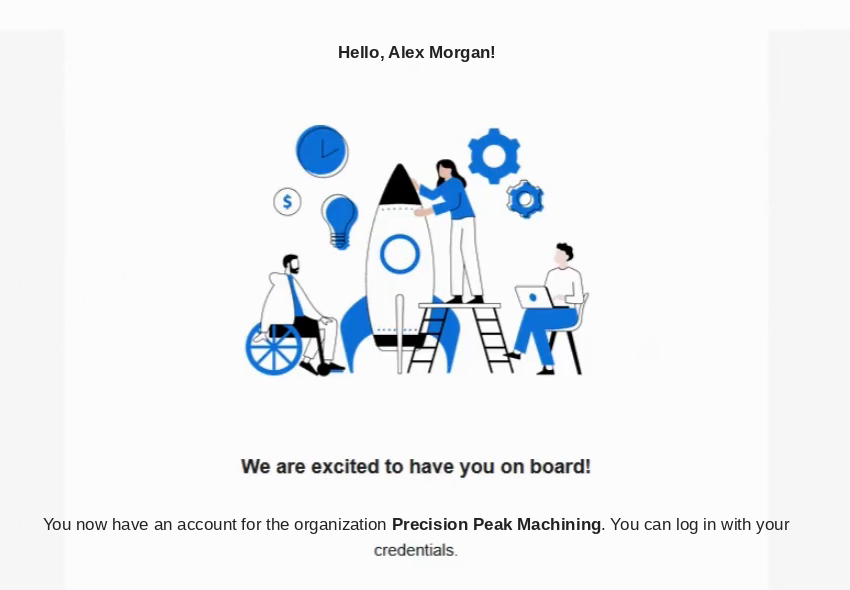
The confirmation email names the new organization What to do
- Click your profile picture and choose Subscription. A new account only shows the card button here.
- Click Card Info, then + Add Card. Enter the card details and save.
- Adding the card turns Demo mode off.
- The modules, devices and locks are set up with you on the setup call.
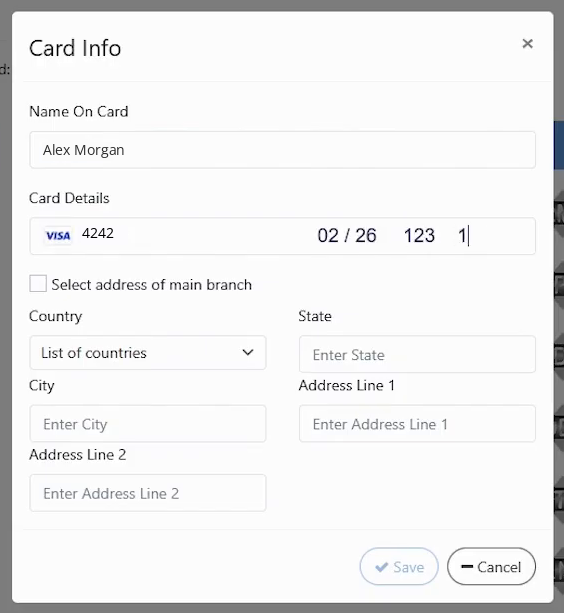
Card Info window: add the card What to do
- Click your profile picture in the top right corner, then Departments.
- Click + and add each department one at a time, for example Turning, Milling or Shipping, until the list matches how the shop is organized.
Employees are assigned to departments later. Together with locations, departments tell the system where machines and people belong.
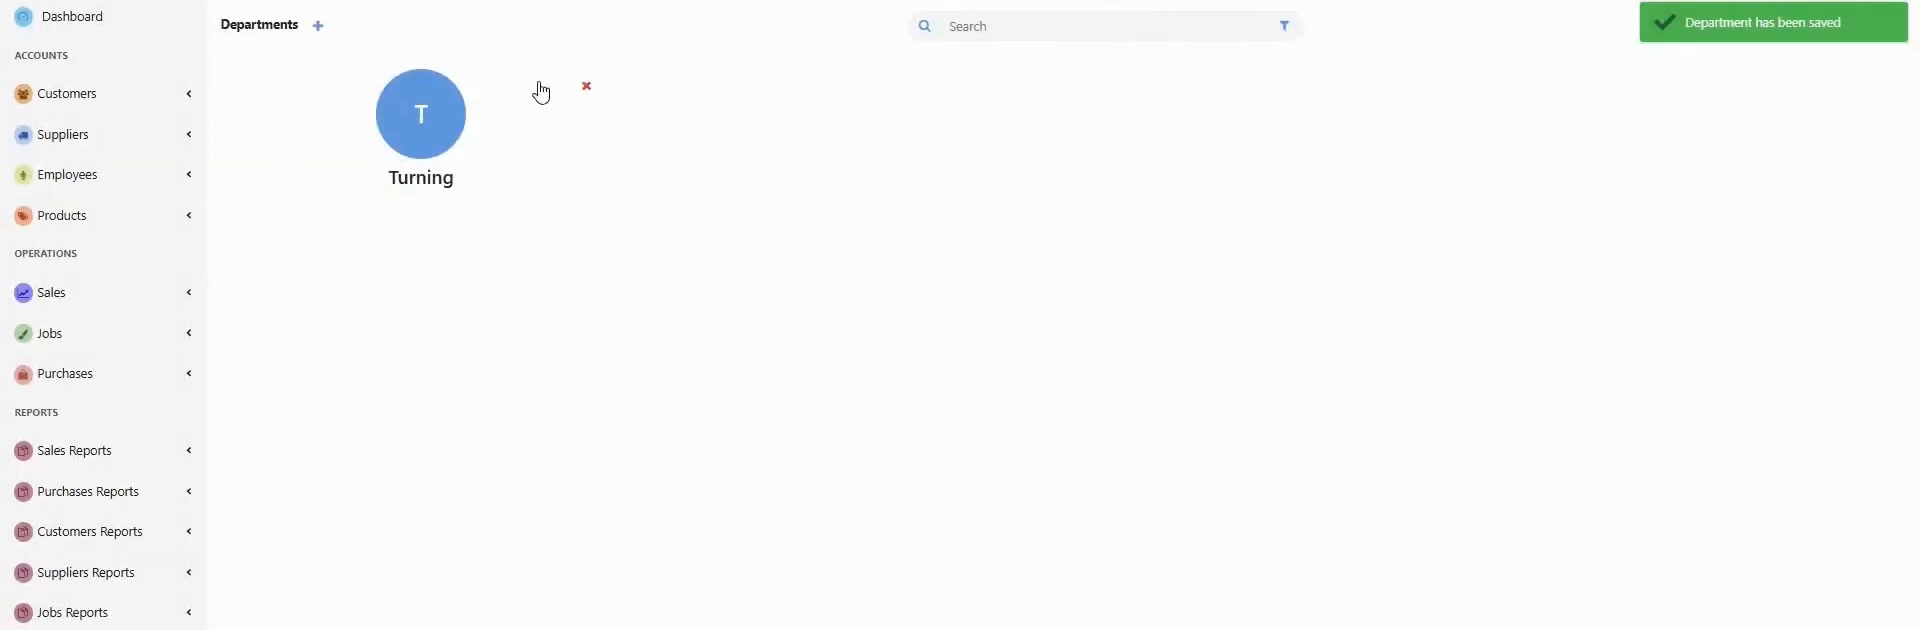
A department saved What to do
- In the left menu, open Employees and click +.
- Fill in all required fields: name, contact details and the rest. Enter as much correct information as you can, since it is used for tracking and reports. Then save.
- Many employees? Use Import employees. Download the official employee template, paste the list into it without changing the format, and upload it back.
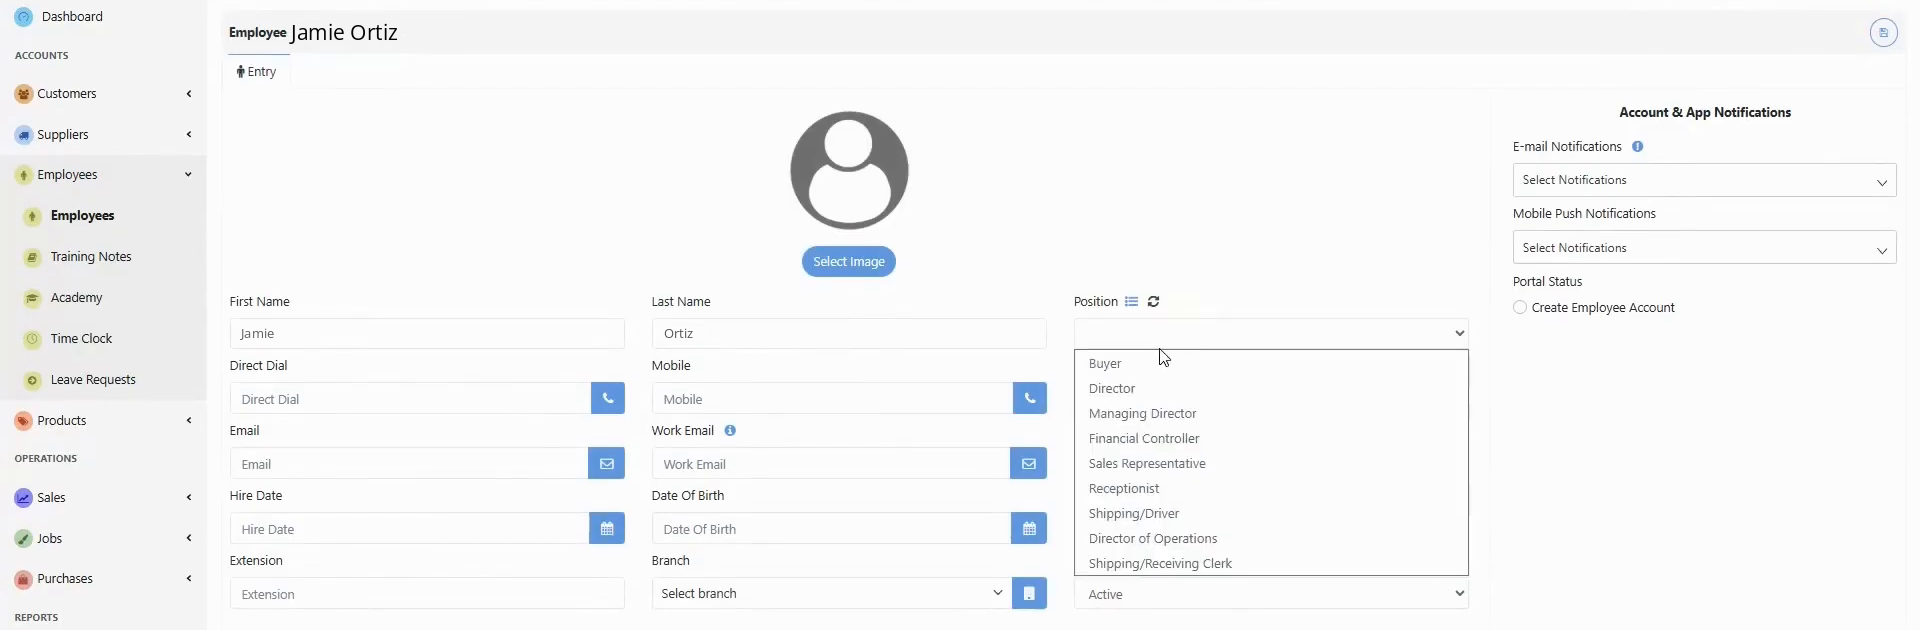
New employee form 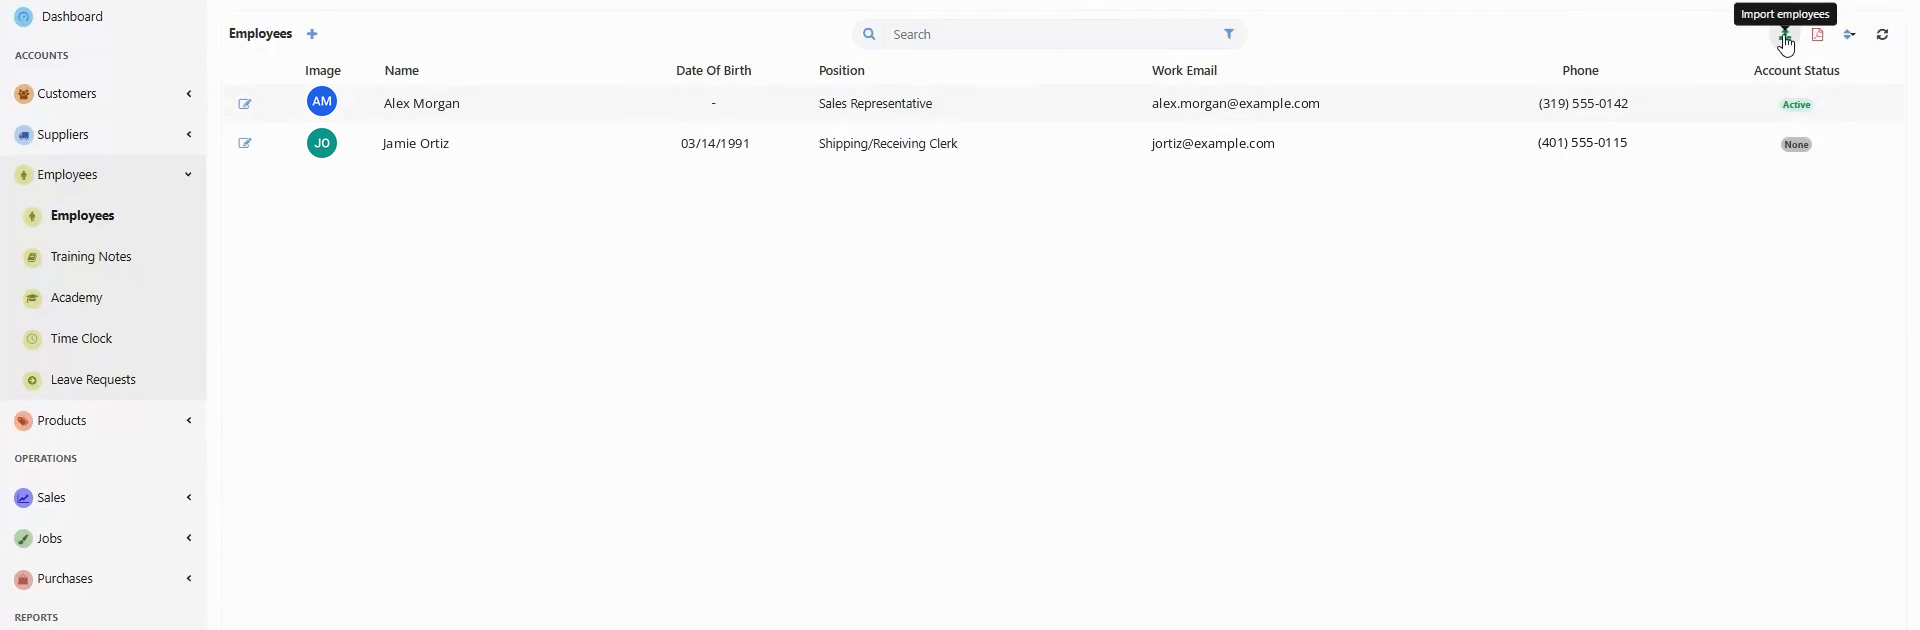
Employees list, with the Import employees button What to do
- Every employee who will use the kiosks needs a PIN or an RFID badge number. Add it in the Privacy tab of the employee.
- To read a badge number, plug in the badge reader, click in the card number field and scan the card. The number fills in by itself.
- Save.
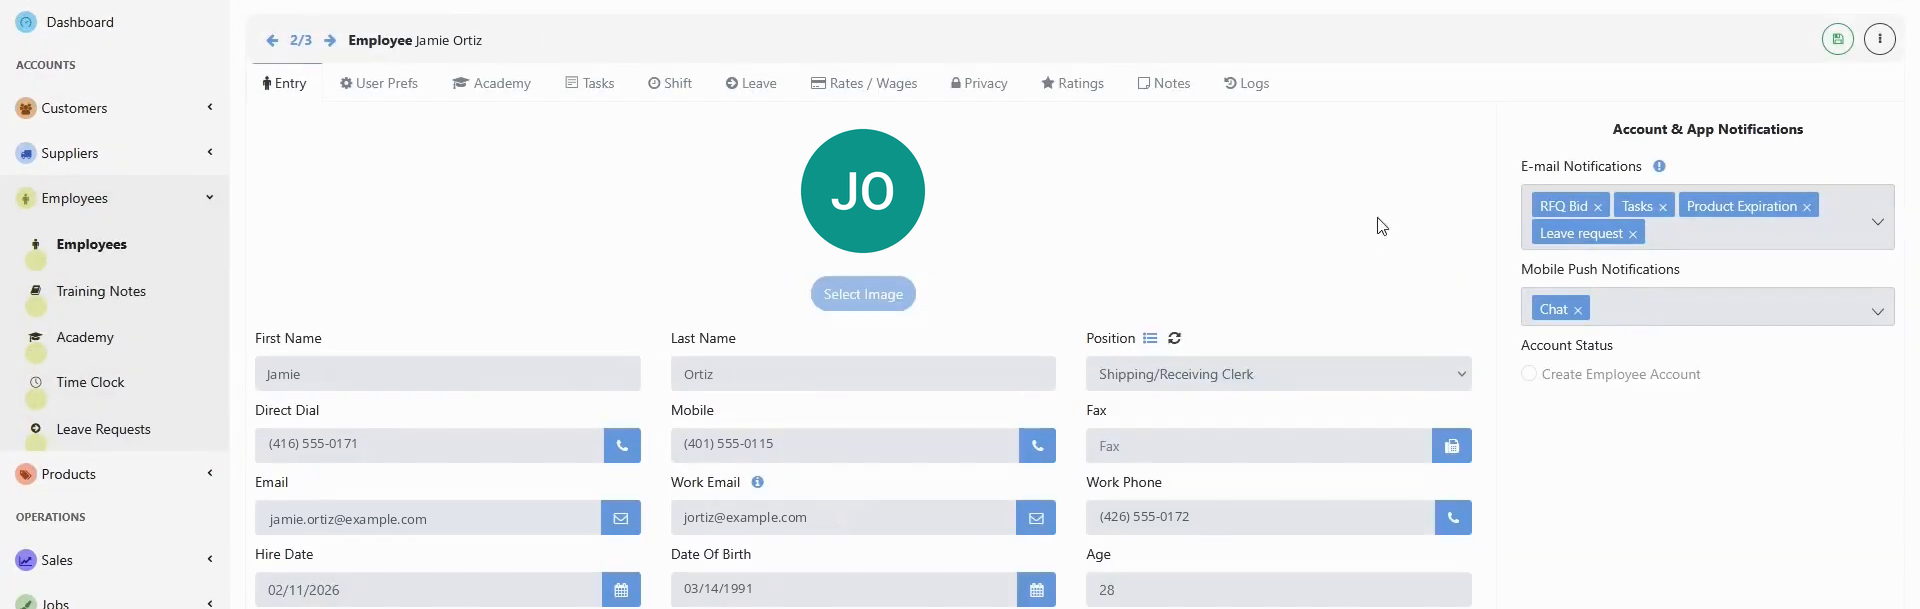
Employee profile. The Privacy tab holds the PIN and badge number What to do
- Click your profile picture, then Teams, then +.
- Enter the team name and a short description, and an image if you like. Pick the department and a color. Save.
- Open the team and add employees from the drop-down list.
- Choose a team leader. The team leader gets the admin section on the vending portal, to adjust stock levels and open locks, so choose carefully.
When every employee is in a team, the structure is done. You can edit or delete a team at any time.
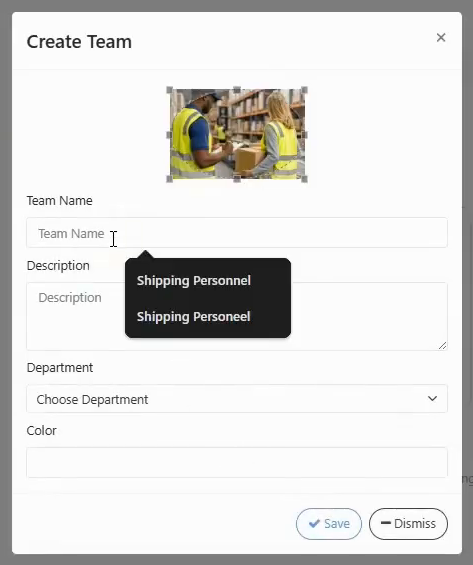
Create Team window 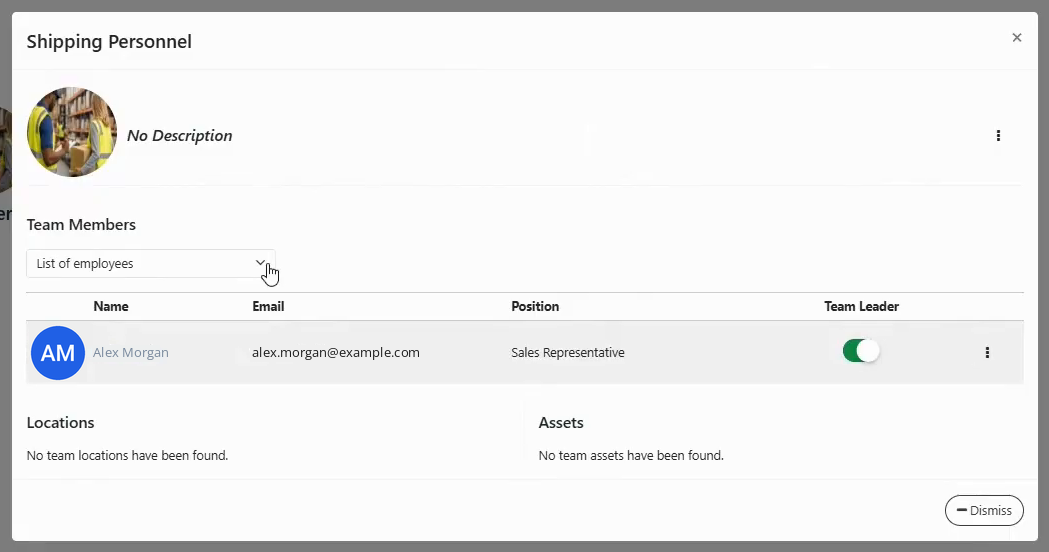
Team members, with the Team Leader switch What to do
- Click your profile picture, then Locations, then +.
- Name the location, add an image if you like, and pick the teams that can use it.
- Enter the shop address, or a different address if ShopXpert runs in more than one building. Save.
- Repeat for every place in the shop where you will install ShopXpert.
Recommended: a holding location for each building. Receive large deliveries there (for example 50 pieces), then move only what is needed to the final location where the product is used. This keeps extra stock in one place.
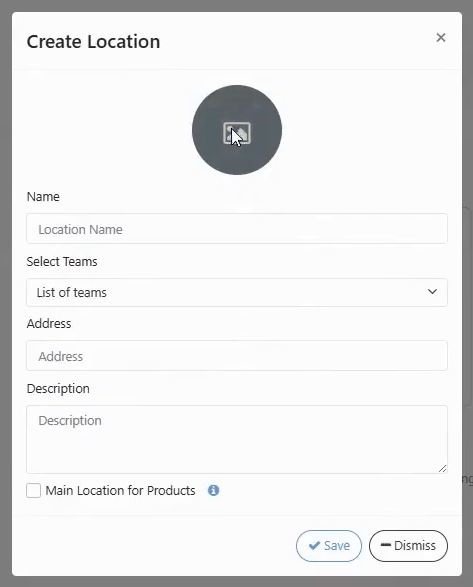
Create Location window What to do
- In the left menu, open Suppliers and click +.
- Enter your company details: name, phone, email and the other required fields.
- Set Approval Status to Approved. Pick a category (the video uses Material) and a color.
- Fill in the default billing address. If the shipping address is the same, use the copy button instead of typing it twice. Save.
- Add the contact person from your company: the person who restocks the kiosks and handles purchase orders. Save the contact.
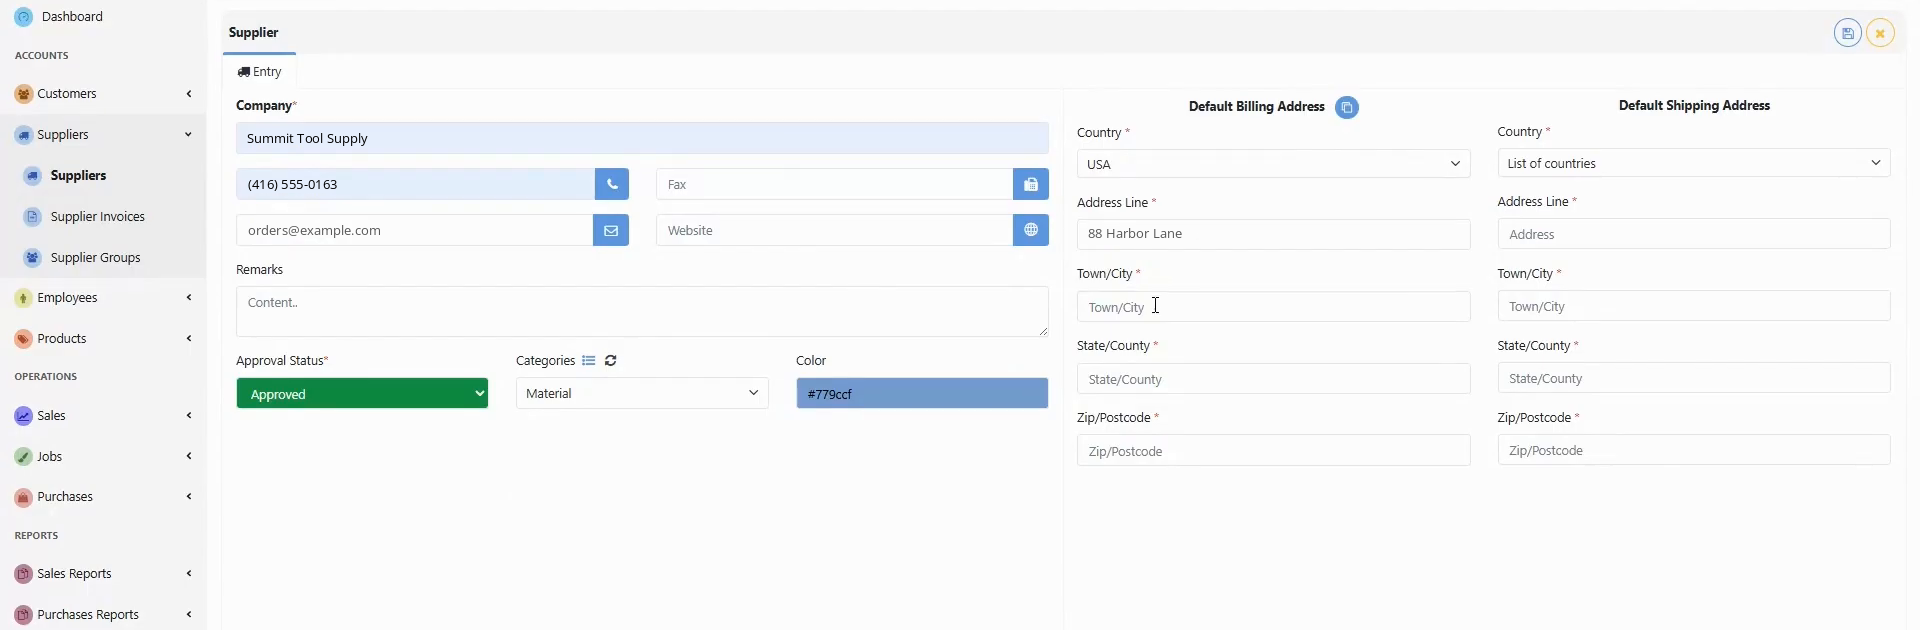
Supplier form with made-up details What to do
- In the top right corner, open Settings, then Device Enrollment, then +.
- Manufacturer: ShopXpert. Model: the model number from the device label, if there is one.
- Give the device a clear, unique name. Device type: Vending. Set the session time and the location of the device.
- Turn on Checkout multiple products if people may take more than one item per session. Save.
- The device is created and waits for activation. Copy the activation token.
- On the kiosk, enter the token and tap Request Approval.
- Back on Device Enrollment, refresh the list and approve the device.
- On the kiosk, tap Reload Page. Employees can now log in with their badges.
Repeat for every kiosk.
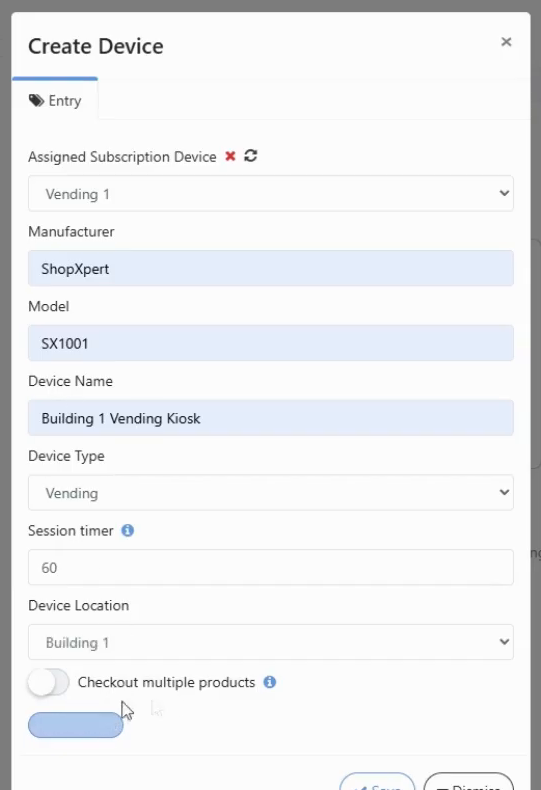
Create Device: manufacturer, model, name, type, session time, location 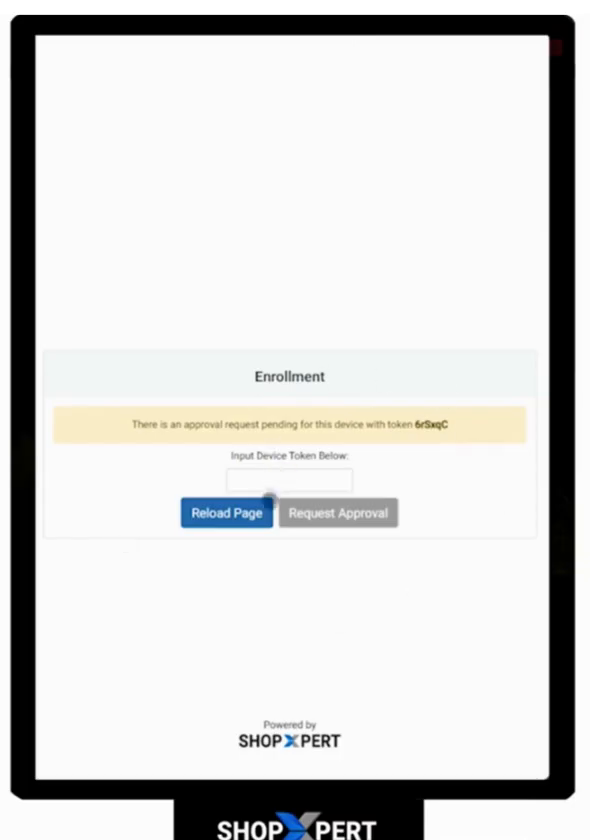
On the kiosk: enter the token and request approval What to do
- In the left menu, open Products, click Import Products (top right) and Download Template. An Excel file downloads.
- Paste the customer’s product list into the template. Do not change the columns. Leave a column empty if you have no data for it.
- Give each product a category, and a subcategory if needed, in one cell divided by a forward slash (/). You can add as many as you like.
- Give each product a main location and a device. Copy the names exactly from the app to avoid spelling mistakes.
- Drawers: count the drawers in each cabinet. Cabinet 1 with five drawers is 1-1 to 1-5 (cabinet number, then drawer number). Every drawer number must be unique.
- Bins: count the bins in each drawer. Ten bins are A to J. We strongly recommend labeling every bin on the cabinet.
- Enter the drawer and bin for each product. Also fill in the return drawer and return bin. Usually they are the same as the storage spot, but you can pick another one, for example an inspection or holding drawer.
- For product images, type the image file name with .jpg or .png on that product’s line.
The template has a second sheet called Legend that explains what goes in each column.
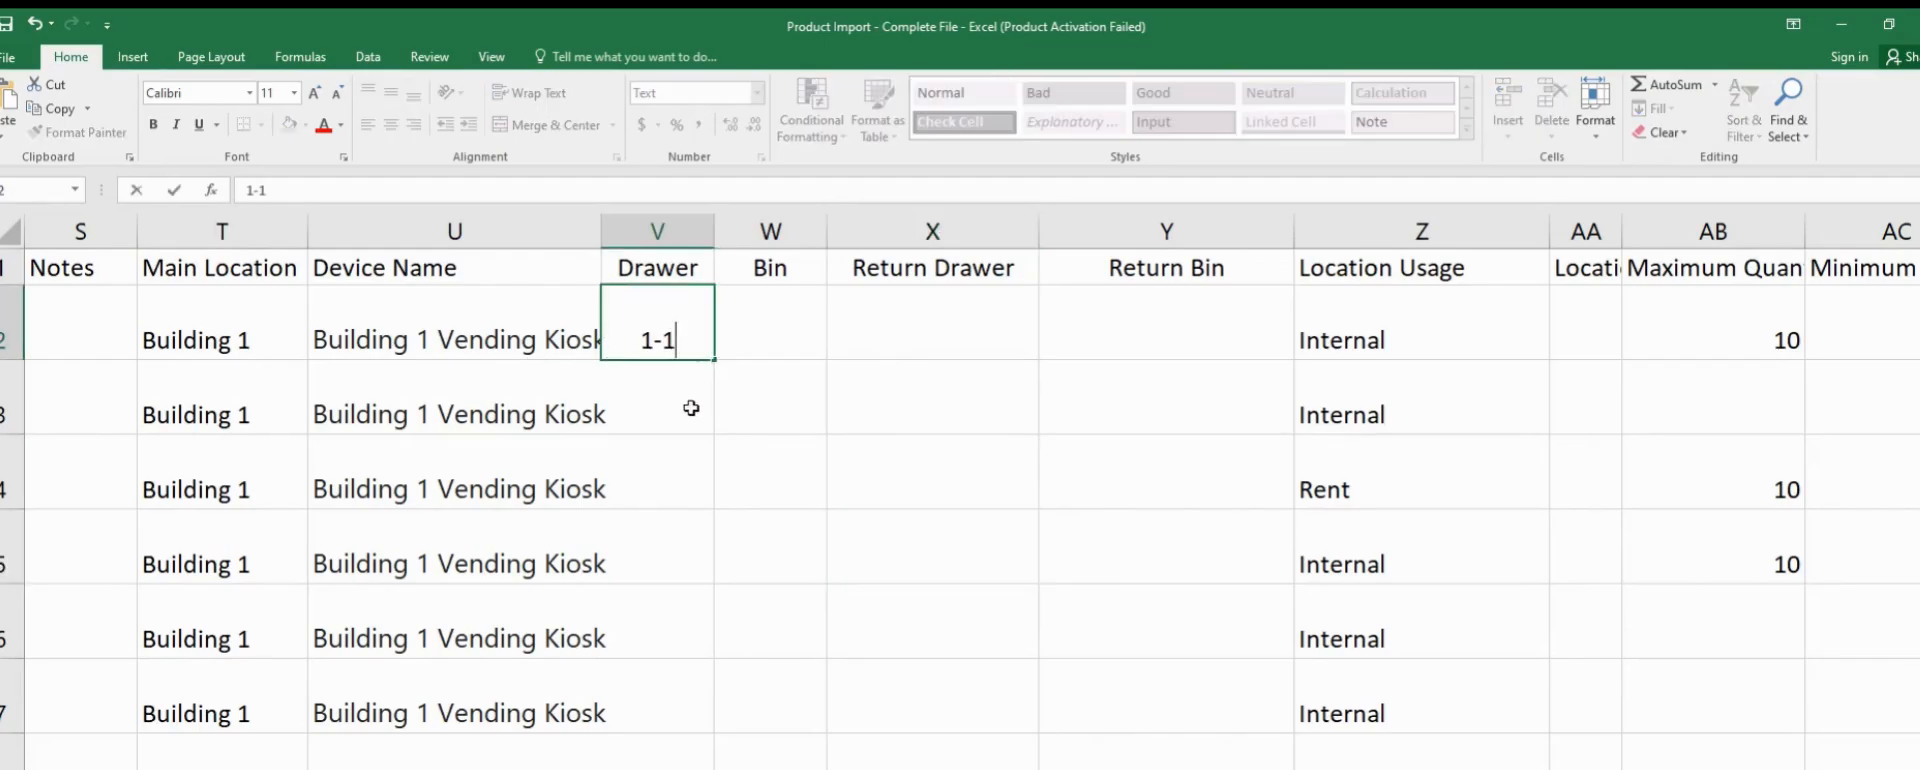
The import template with drawers, bins and return locations 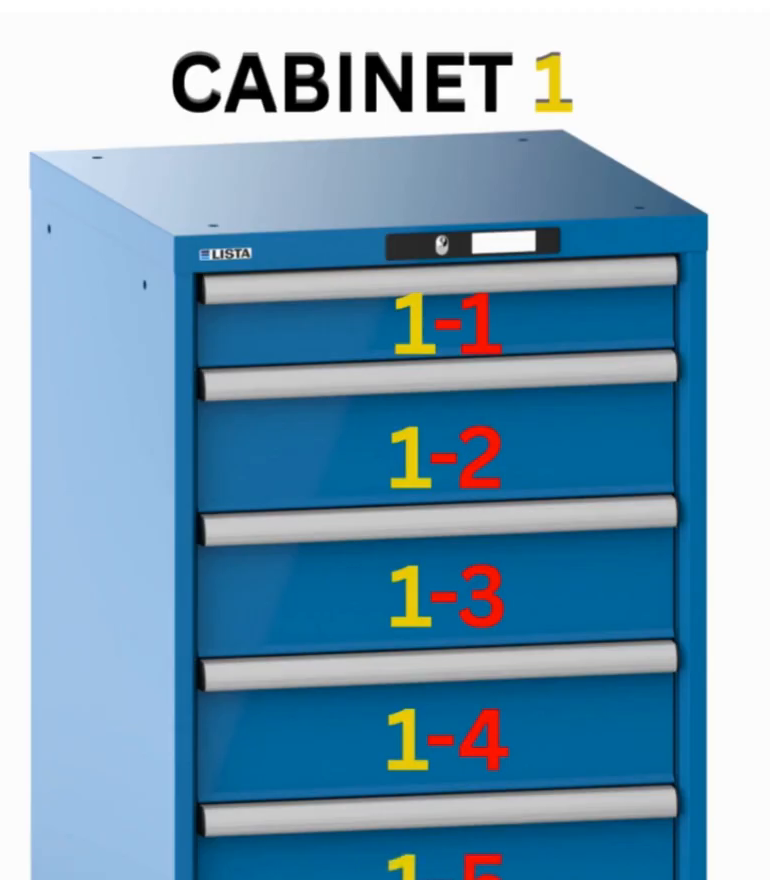
Cabinet 1, drawers 1-1 to 1-5 What to do
- Go back to Products > Import Products and click Upload Products File. Pick your finished template.
- If you have product images, click Upload Images. Images are highly recommended: they make products easier to find on the kiosk.
- Click Save Products.
- Log in to the kiosk with a PIN or badge and check that the products show. If they do, the device, locations, drawers and bins are set up right.
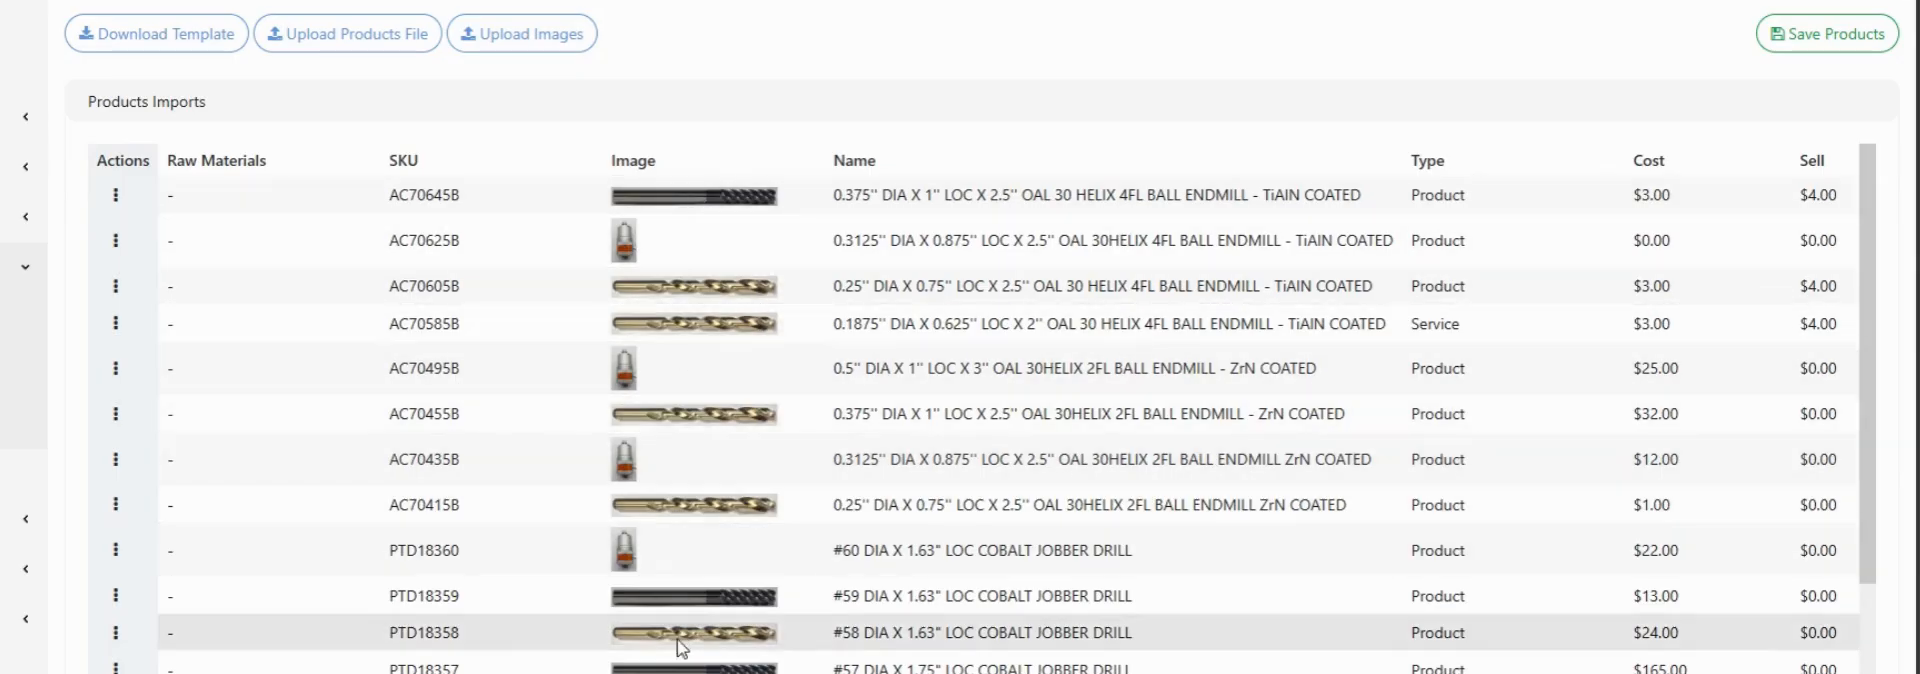
Import Products, with Upload Products File, Upload Images and Save Products What to do
- In the top right corner, open Settings > PO Automation.
- Pick how often it runs, the days and the time. In the video it runs weekly, Monday to Friday at 6:00 AM.
- Each run checks every product with a location. If the stock is below the product’s maximum, a purchase order is created for the missing quantity.
- To do it by hand instead: in the left menu open Inventory and click Create PO (top right). It does the same check right away.
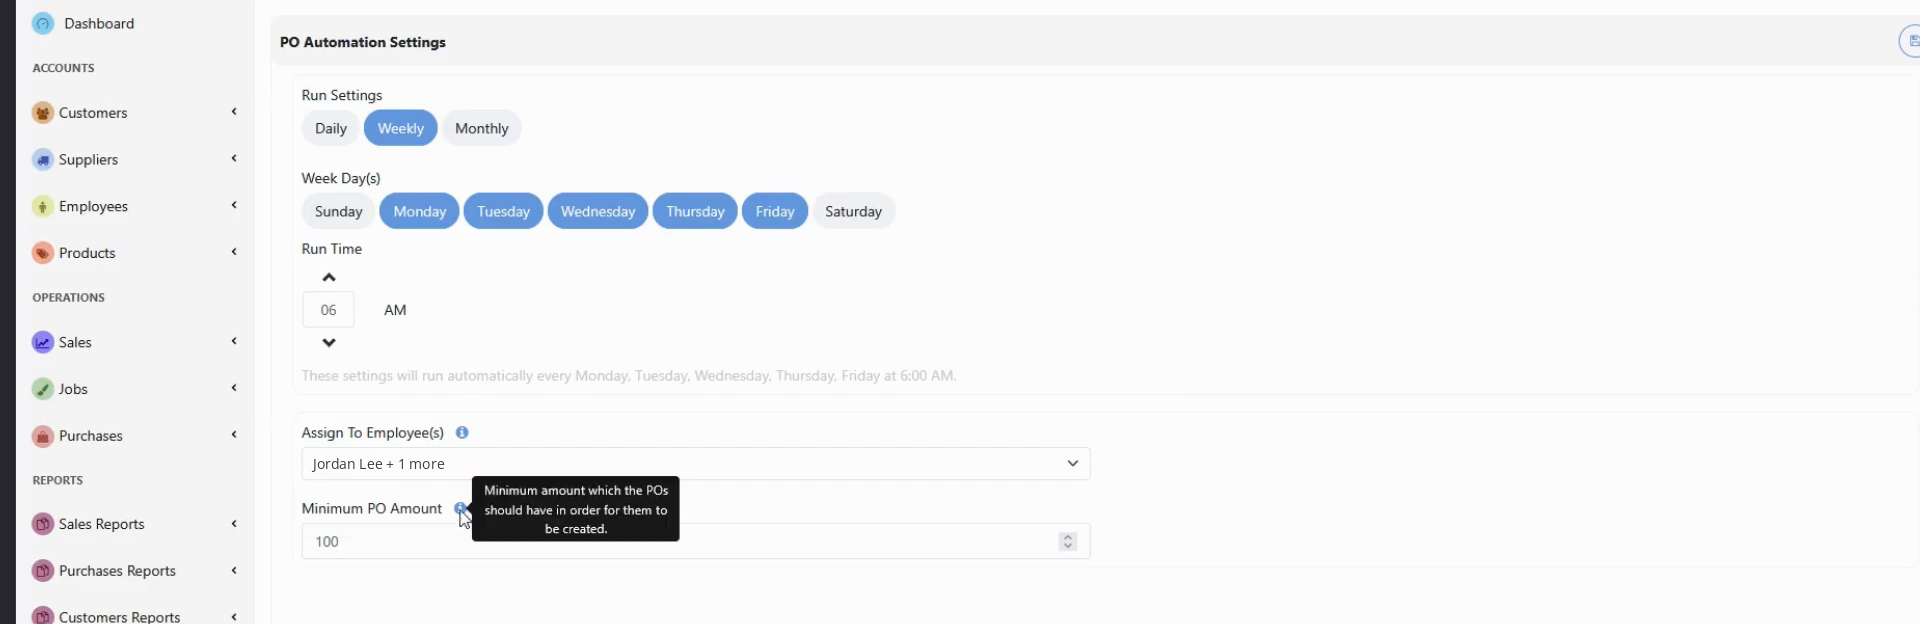
PO Automation settings 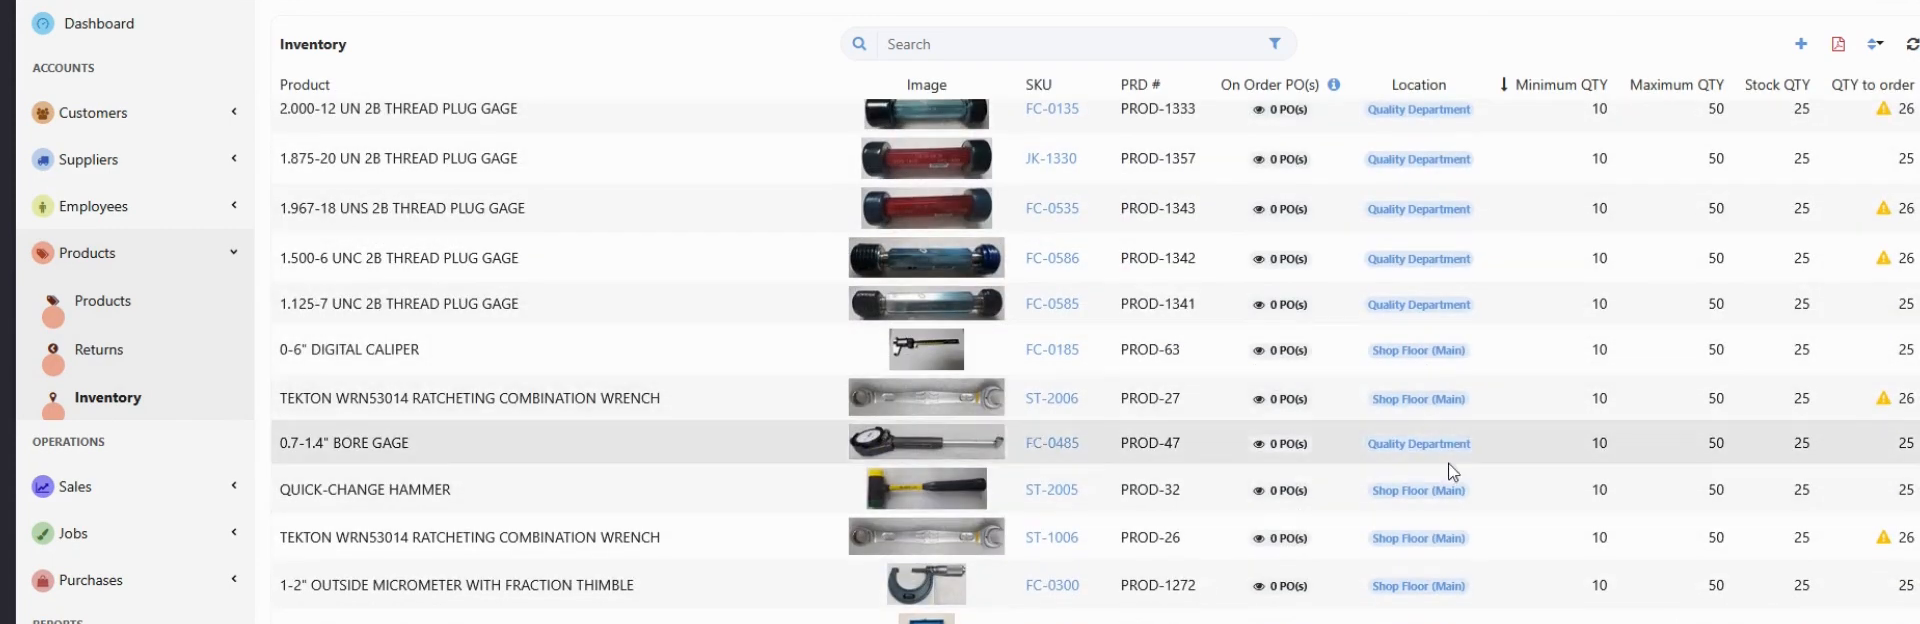
Inventory, with current, minimum and maximum quantities What to do
- The Vending Report shows who took which tool and for which job.
- Click the filter icon to narrow it down, for example by department or by employee. You can use several filters at once.
- Click Save To Favorites to keep a filter for next time.
- The Inventory Report shows live stock levels for every product with a location. It has the same filters and saved filters.
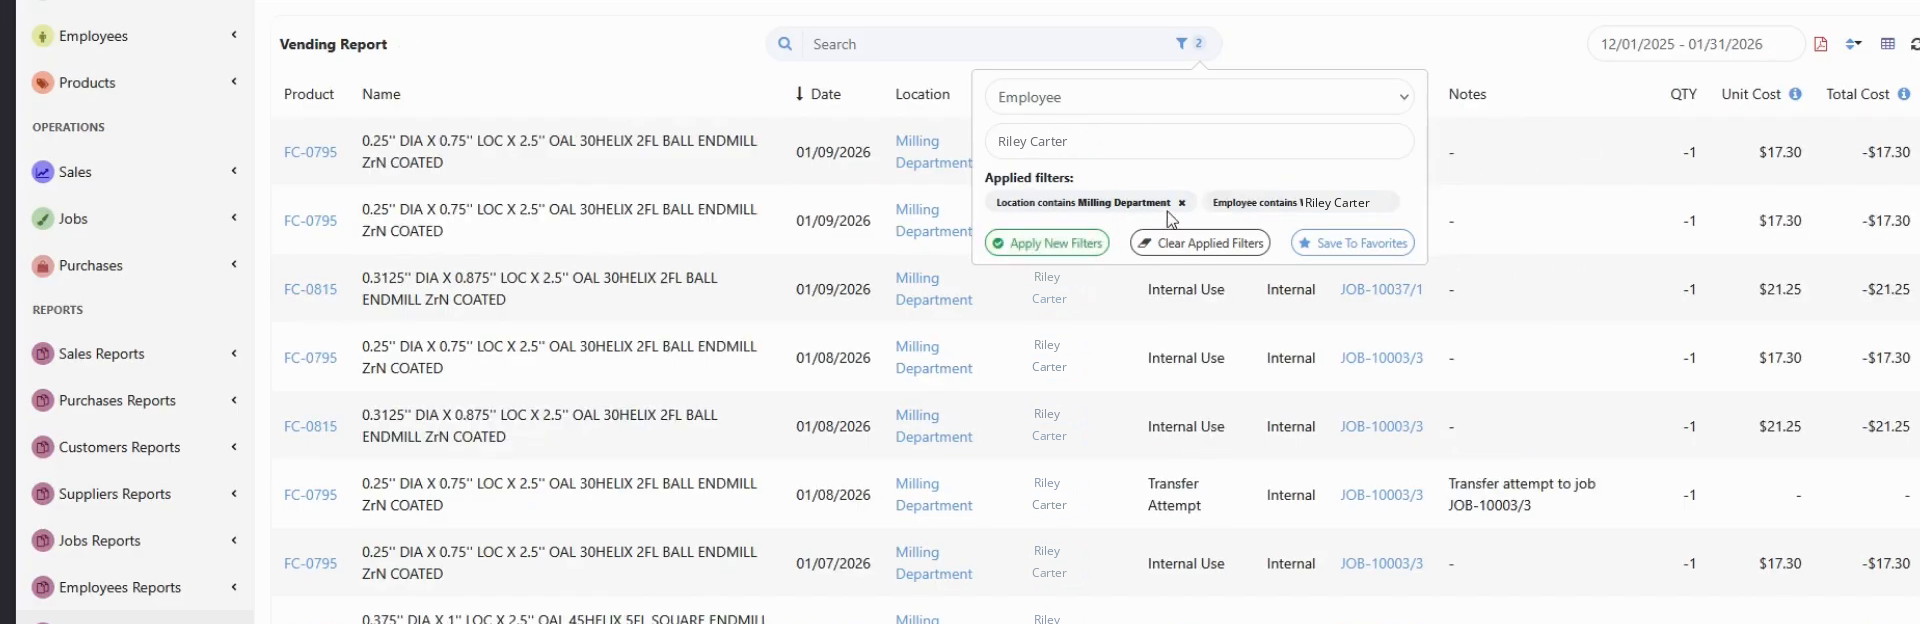
Vending Report filtered by department and employee What to do
- On the kiosk, tap the filter icon.
- Pick a field, for example category, subcategory or location. Add more fields if needed.
- Save the filter. It is linked to that person’s badge or PIN, so next time they log in they just apply it.
That is the full setup: account, structure, devices, products and purchase orders.
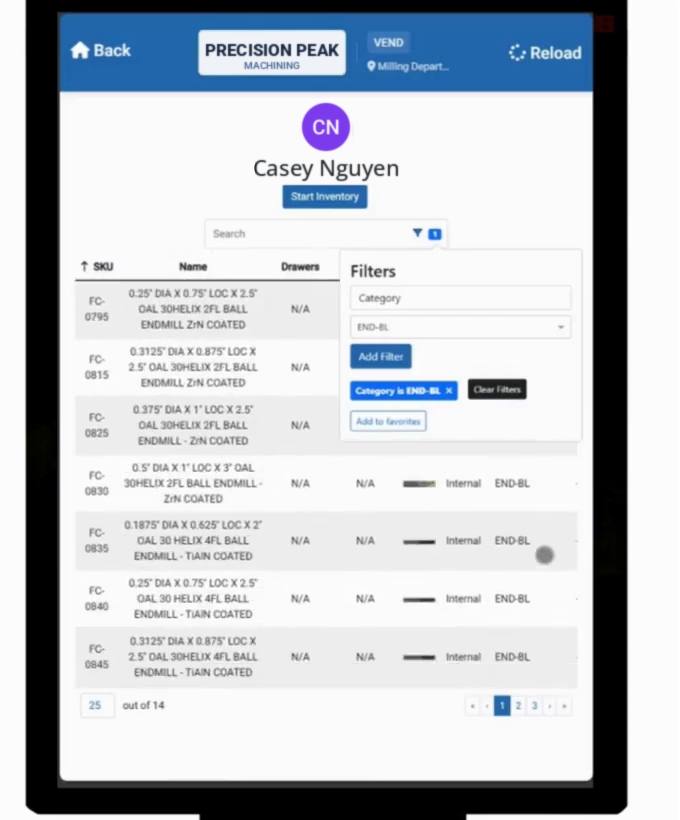
Kiosk with a saved filter for one employee
All done?
Start a chat or email support@shopxpert.com and we will book your go-live review.
Tessa can point you to the right guide, or bring in a ShopXpert teammate.