
How To Create & Assign Shifts To Employees
Create your company shifts in Settings > Timeclock, then assign them to each employee from their Shift tab.
Shifts tell ShopXpert when each person is expected to work. Once an employee has a shift for the day, they can clock in, take a lunch break and clock out from the Employee Portal or a Time Clock tablet, and their hours, overtime and attendance are tracked against that schedule.
Setting up shifts takes two steps: first create the shifts your company uses (for example Day Shift, Night Shift or Office Shift), then assign them to each employee.
1. Create your company’s shifts
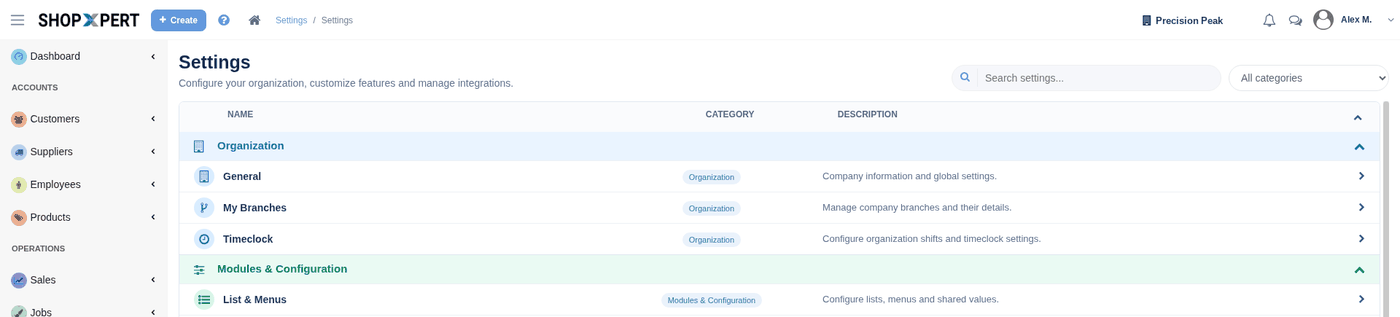
- Open the Admin menu at the top right, go to Settings and select Timeclock.
Settings > Timeclock (one word) is where shifts are set up. Time Clock (two words) under Employees in the side menu is a different page that shows who is clocked in.
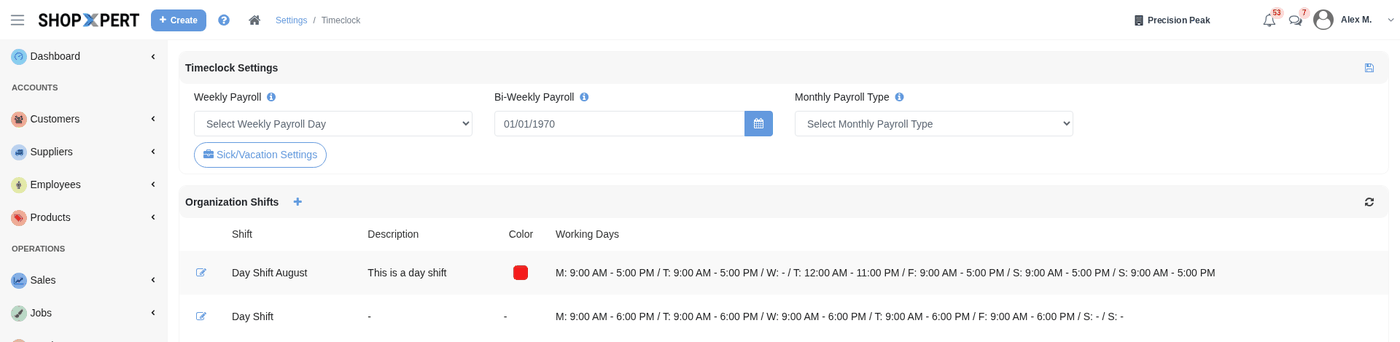
- At the top of the page, the Timeclock Settings card sets how your payroll periods work:
- Weekly Payroll: a day of the week
- Bi-Weekly Payroll: a date
- Monthly Payroll Type: Specific date or Specific day
The Sick/Vacation Settings button on the same card opens the sick and vacation options.
- Below it, the Organization Shifts section lists all of your company’s shifts. Click the + icon to add a shift (or the Add shift button if the list is still empty). To change an existing shift, click the pencil icon on its row.
- In the Organization Shift form, fill in:
- Shift Name, for example “Day Shift”, “Night Shift” or “Office Shift”
- Description (optional)
- Color, so the shift is easy to spot on calendars
- Timezone
- Each day from Monday to Sunday shows Day Off until you tick it. Tick the days this shift works and set the start and end hours for each one.
- Click Save. The shift is now available to assign to employees.
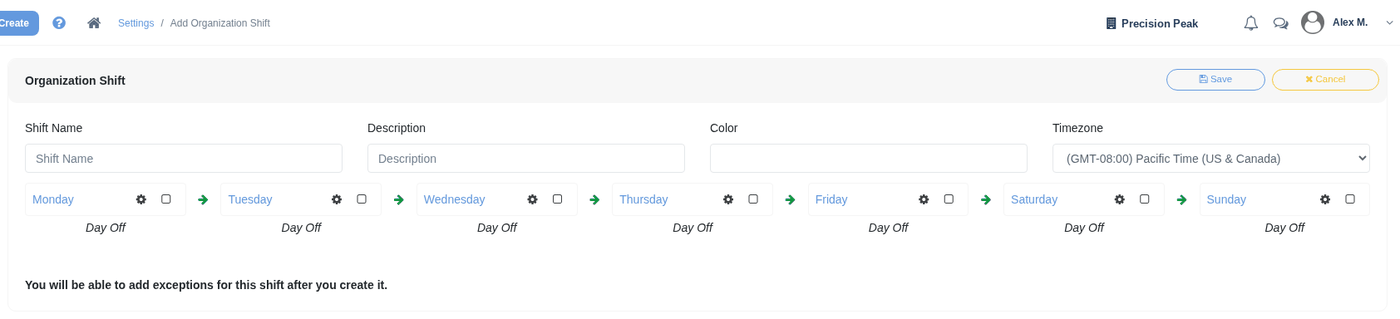
As the form notes, exceptions (days when the shift runs differently, such as a holiday or a short Friday) are added after the shift is created.
Add an exception to a shift
- In Organization Shifts, click the pencil icon on the shift, then click Edit.
- Click + Add Exception. A new row appears with these columns: Type, Name, Recurrent, Date, Start Hour, End Hour and Day Settings. Saved exceptions also show a Created On date.
- Fill in the row and save it.
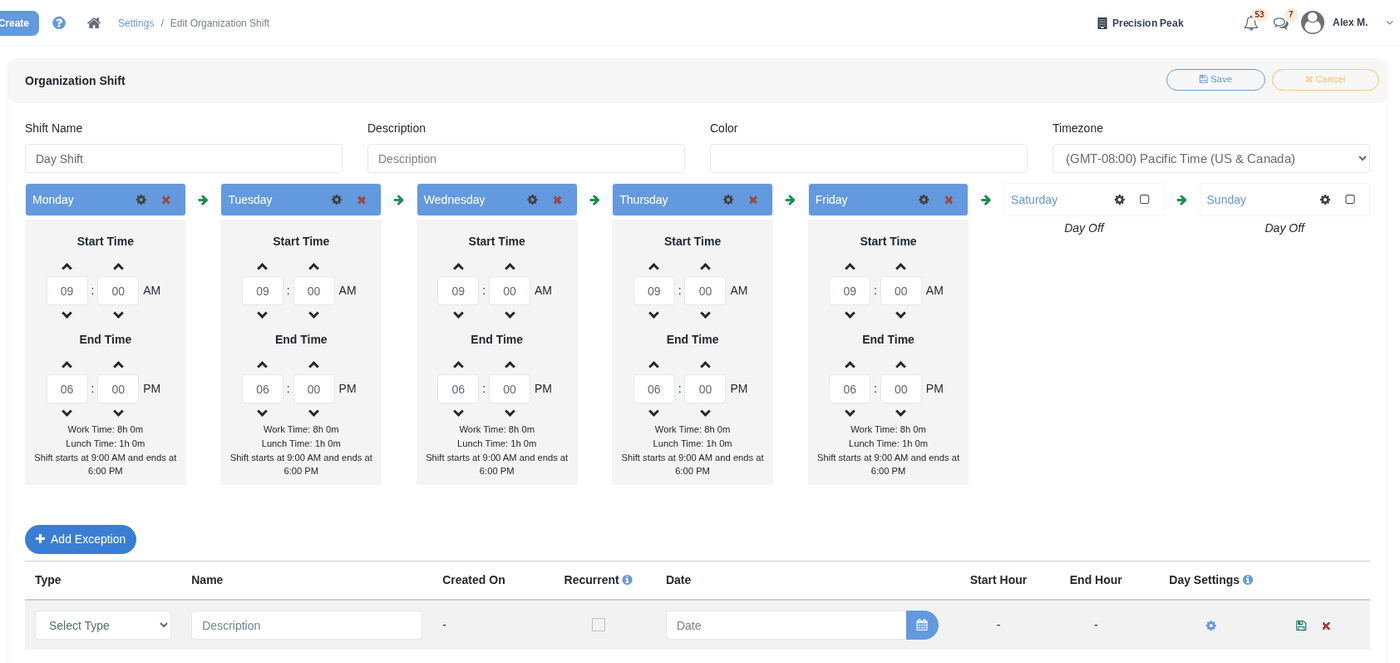
You can come back here at any time to edit a shift or add a new one as your schedule changes.
2. Assign a shift to an employee
- Go to Accounts > Employees > Employees and click the edit icon on the employee you want to schedule.
- Select the Shift tab. It shows a month calendar for that employee.

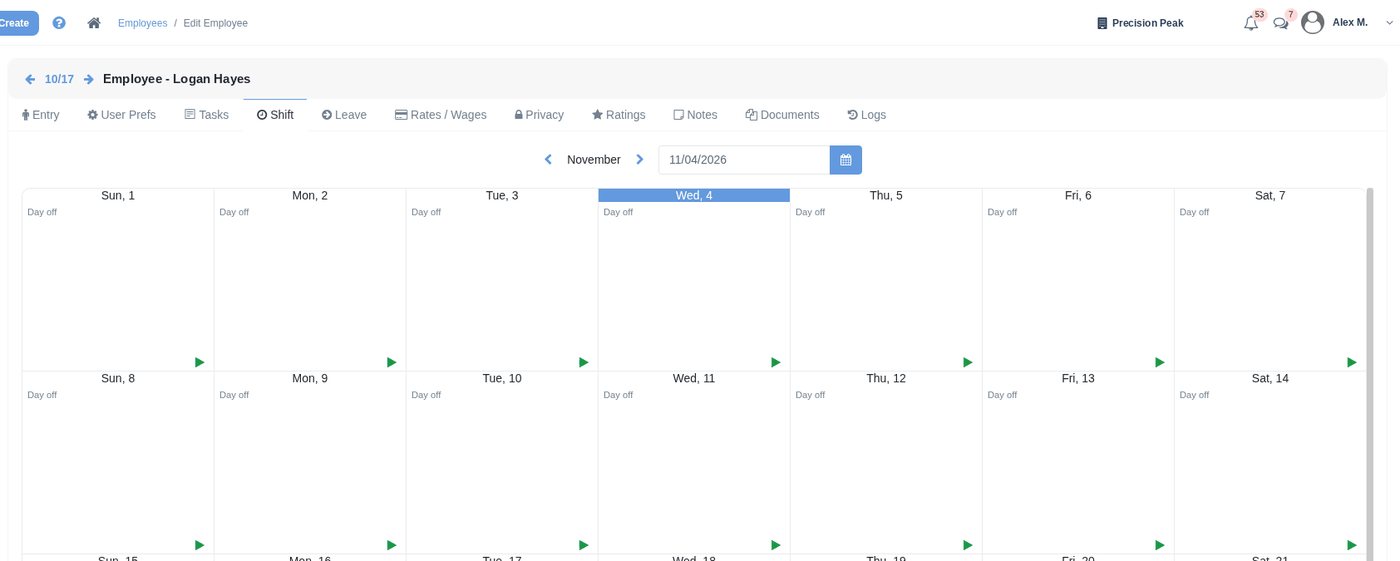
- Click the green arrow on the day where the shift should start.
- Under Organization Shift, choose the shift from Select Shift, then click Start Shift.
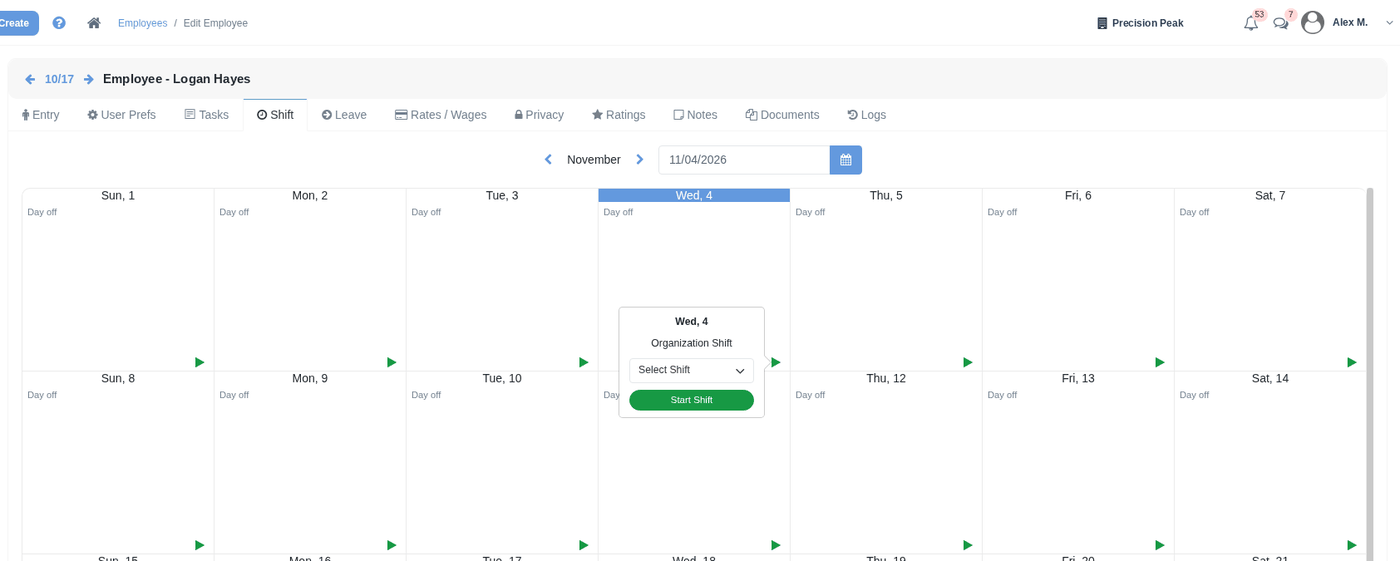
- A confirmation asks whether the shift is one-time or recurring:
- This Date: the shift applies to that day only
- This and future dates: the shift repeats from that day on
Each day with a shift then shows the shift name, its timezone, the time worked, and when it Starts at and ends at, with View Tasks and View Timeclocks links. A red Missed tag shows where a shift was missed.
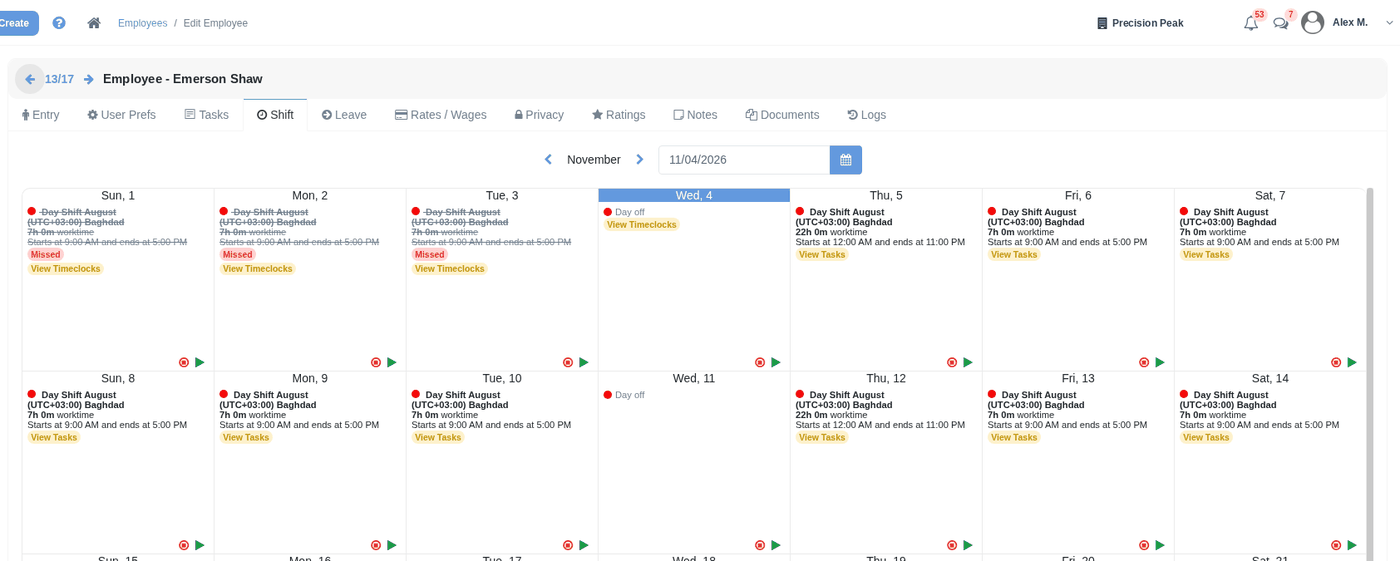
Repeat for each employee. Assigning shifts this way keeps everyone’s schedule organized and helps make sure every shift has enough people on it.
3. See who is on shift
To check everyone at once, go to Employees > Time Clock in the side menu. Each employee’s row shows their current Status (for example Day off or No shift) and their hours for Today, This Week and This Month.
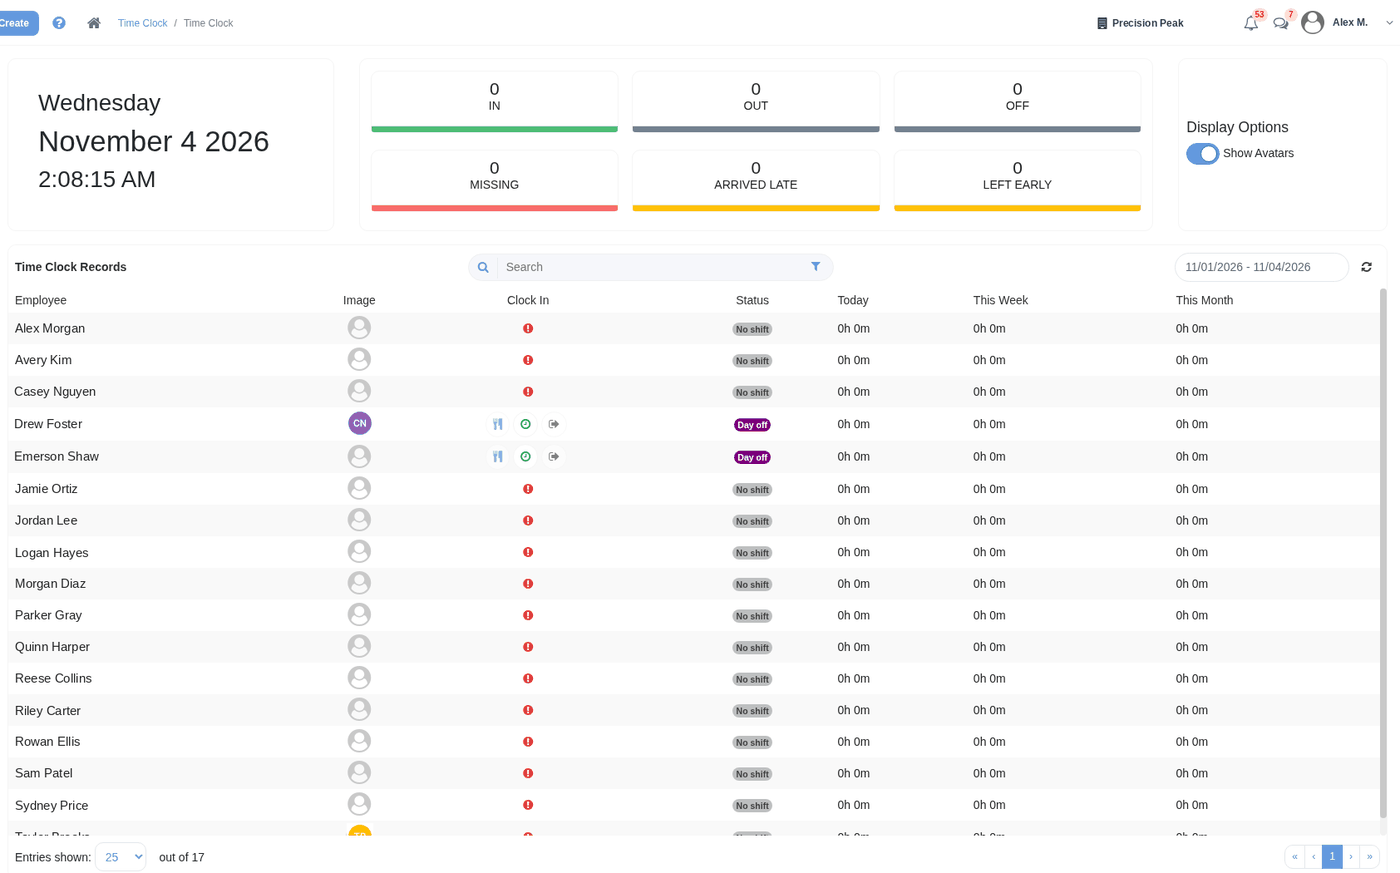
Employees clock in from the Employee Portal or a Time Clock tablet. The Clock-In, Lunch Break and Clock-Out buttons are only available when the employee has a shift for the current day, so an employee showing No shift here won’t be able to clock in until one is assigned.
Tips
- To see or edit clock-in times later, open the employee’s Shift tab and use View Timeclocks on the day. See How To View & Edit Employee’s Info.
- Time off is handled with leave requests. See How To Do A Leave Request.
- Pay rates for specific roles or shifts are set in Rates / Wages. See How To View & Edit Rates & Wages.
- If people clock out for breaks or shift changes while a task is still running, turn on Timeclock Clock Out in the job’s Task Options so tasks still in progress are reopened when the employee clocks out. See Jobs, Stages & Tasks.
Tessa can point you to the right guide, or bring in a ShopXpert teammate.